
Scanning a container image for vulnerabilities or bad practices in your Azure Pipelines using Sysdig Secure is a straightforward process. This article demonstrates a step by step example on how to do it.
The following proof of concept showcases how to leverage the sysdig-cli-scanner in Azure Pipelines. Although possible, it is not officially supported by Sysdig, so we recommend checking the documentation to adapt these steps to your environment.
This blog post is focused on the vulnerability scanner available since April 2022. If you are using the legacy scanner, see the official documentation for more information about it.
Sysdig vulnerability scanning classifies images differently depending on where the scanning procedure is performed:
- Pipeline: prior to the runtime phase (in the developer workstation, in a CI/CD pipeline, etc.) performed by the
sysdig-cli-scannertool - Runtime: when the image is running in the execution node and the scanning is performed by a Sysdig agent
In this article, we will cover how to perform a scanning on the pipeline step using Azure Pipelines, as it is a best practice to adopt.
Running the scanner against a container image is as simple as running the sysdig-cli-scanner tool with a few flags (see the official documentation for more information), such as:
SECURE_API_TOKEN=<your-api-token> ./sysdig-cli-scanner --apiurl <sysdig-api-url> <image-name> --policy <my-policy>
The image is scanned locally on the host where the tool is executed, on your laptop or on a container running the pipeline, and only the scanning results are sent to the Sysdig Secure backend.
Azure Pipelines
Azure DevOps gives teams tools like code repositories, reports, project management, automated builds, lab management, testing, and release management. Azure Pipelines is a component of the Azure DevOps bundle and it automates the execution of CI/CD tasks, like running tests against your code, building the container images when a commit is pushed to your git repository, or performing vulnerability scanning on the container image.
Azure Pipeline for vulnerability scanning
An Azure Pipeline defines a bulk of tasks, written in a YAML file, that will be executed automatically when there’s an event, which is typically when there’s a new commit or a pull request in a linked repository.
This allows you to automatically build and push images into registries (like Azure Container Registry), and then deploy them into Kubernetes.
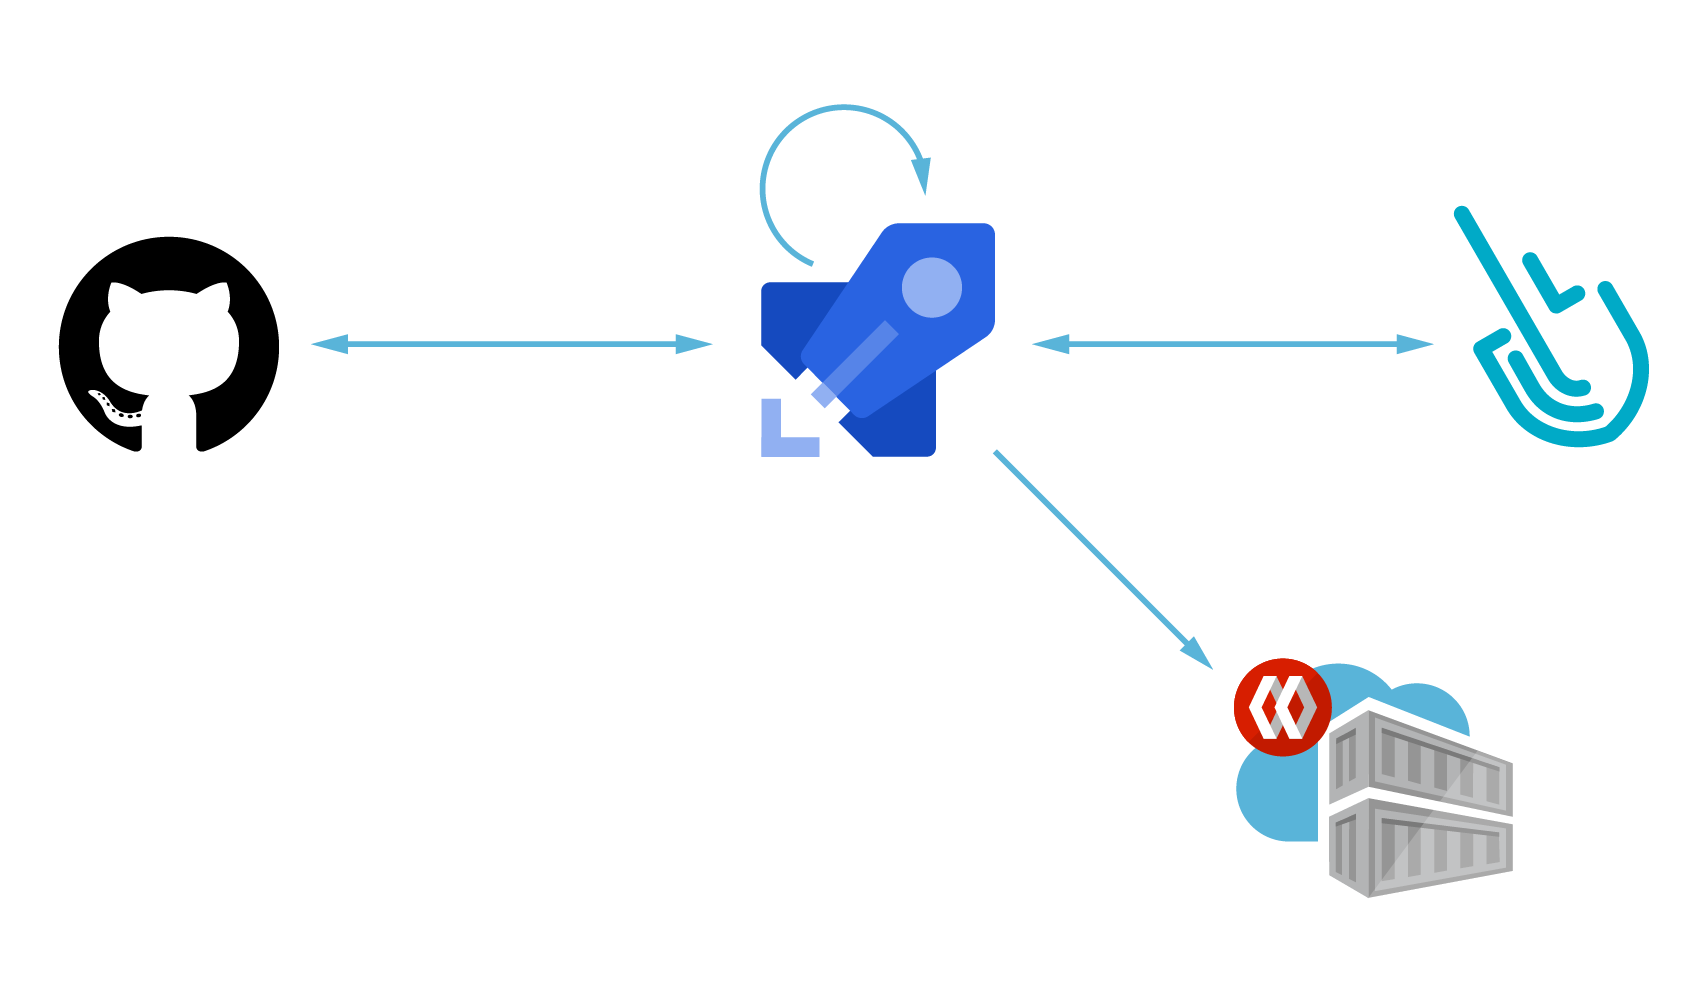
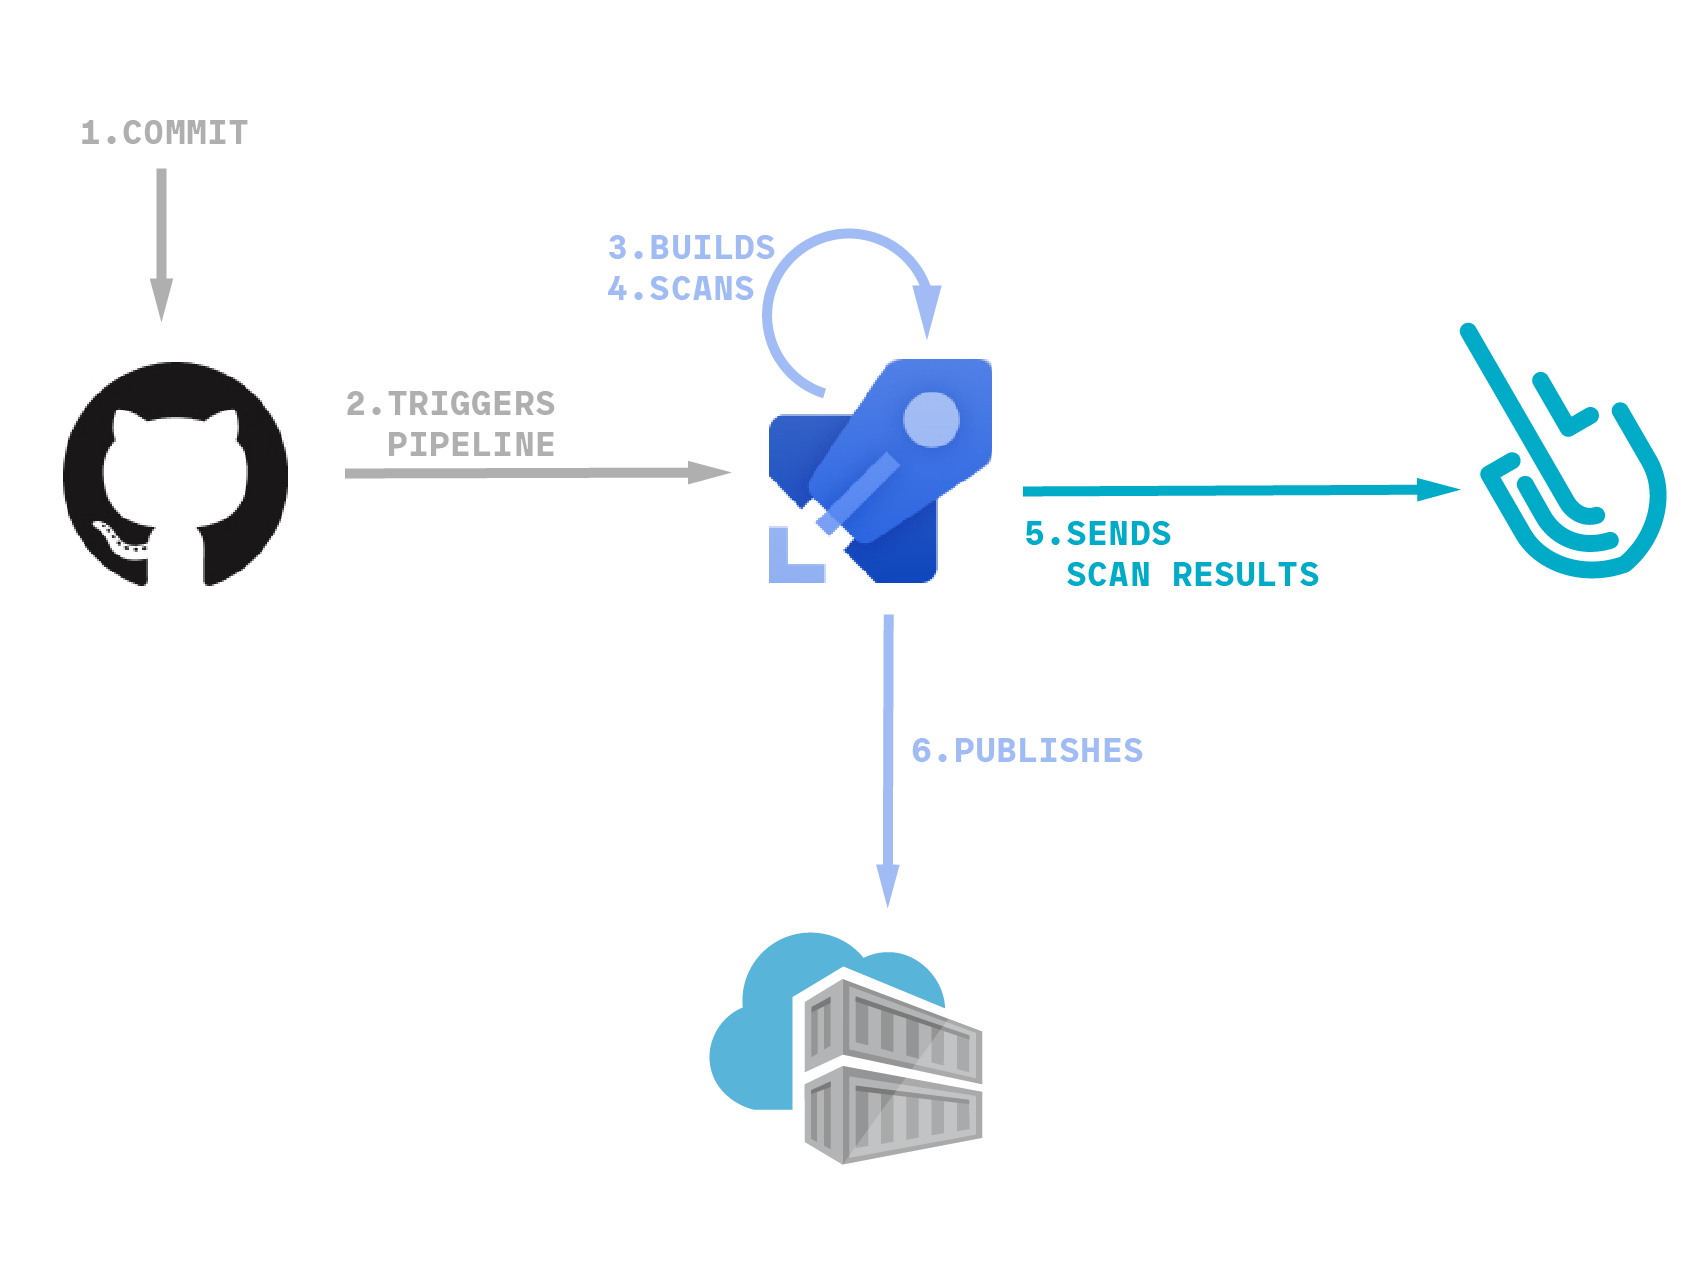
In the example that we use to illustrate this blog post, we will be pushing commits to a GitHub repository that will trigger an Azure Pipeline. Then, the pipeline will build our project into a local image, scan it for vulnerabilities, and publish it to a container registry.
The example application
In order to demonstrate a specific example, we will leverage an simple golang application stored in a GitHub repository that listens into port 8080/tcp and returns a string based on the path you request:
package main
import (
    "fmt"
    "log"
    "net/http"
)
func handler(w http.ResponseWriter, r *http.Request) {
    fmt.Fprintf(w, "I love %s!\n", r.URL.Path[1:])
}
func main() {
    http.HandleFunc("/", handler)
    log.Fatal(http.ListenAndServe(":8080", nil))
}
This simple program is built and containerized as:
FROM golang:1.18-alpine as builder
WORKDIR /app
COPY . .
RUN go mod download
RUN go build -o /love
FROM alpine
COPY --from=builder /love /love
EXPOSE 8080
ENTRYPOINT [ "/love" ]
Giving Azure Pipelines access to GitHub repositories
Azure will access our GitHub repository to download the code needed to build our project and generate the container image. It will also get the azure-pipelines.yaml file stored in the same repository that contains the tasks that conform the pipeline.
Assuming you already have an Azure DevOps account and created a project, follow the next steps to give Azure Pipelines access to GitHub repositories:
If your repository is empty, you will start with a blank yaml file where you need to do the modifications either in the Azure Pipelines editor or by pushing the code directly to GitHub
In our case, we already have the pipeline created as a file in our GitHub repository, so the code shown there is what exists in the repository. We will later explain every step of the pipeline in detail.
Giving Azure Pipelines access to publish container images
This time, we will leverage quay.io to publish our container images.
Assuming you already have:
- A quay.io account
- And an ’empty’ quay repository
It is required to:
- Create a ‘robot’ account
- And then configure Azure Pipelines service connection
Let’s do it:
Don’t forget the connection name. You will use it later to access the registry.
Azure Pipeline secret variables
The sysdig-cli-scanner requires a Sysdig API token to be able to send the scanning results to your Sysdig account.
This can be found in the Settings -> User profile section of your Sysdig account (see Retrieve the Sysdig API Token for more information), and it is a good idea to store it encrypted using secret variables.
Azure Pipeline YAML definition for image scanning with Sysdig Secure
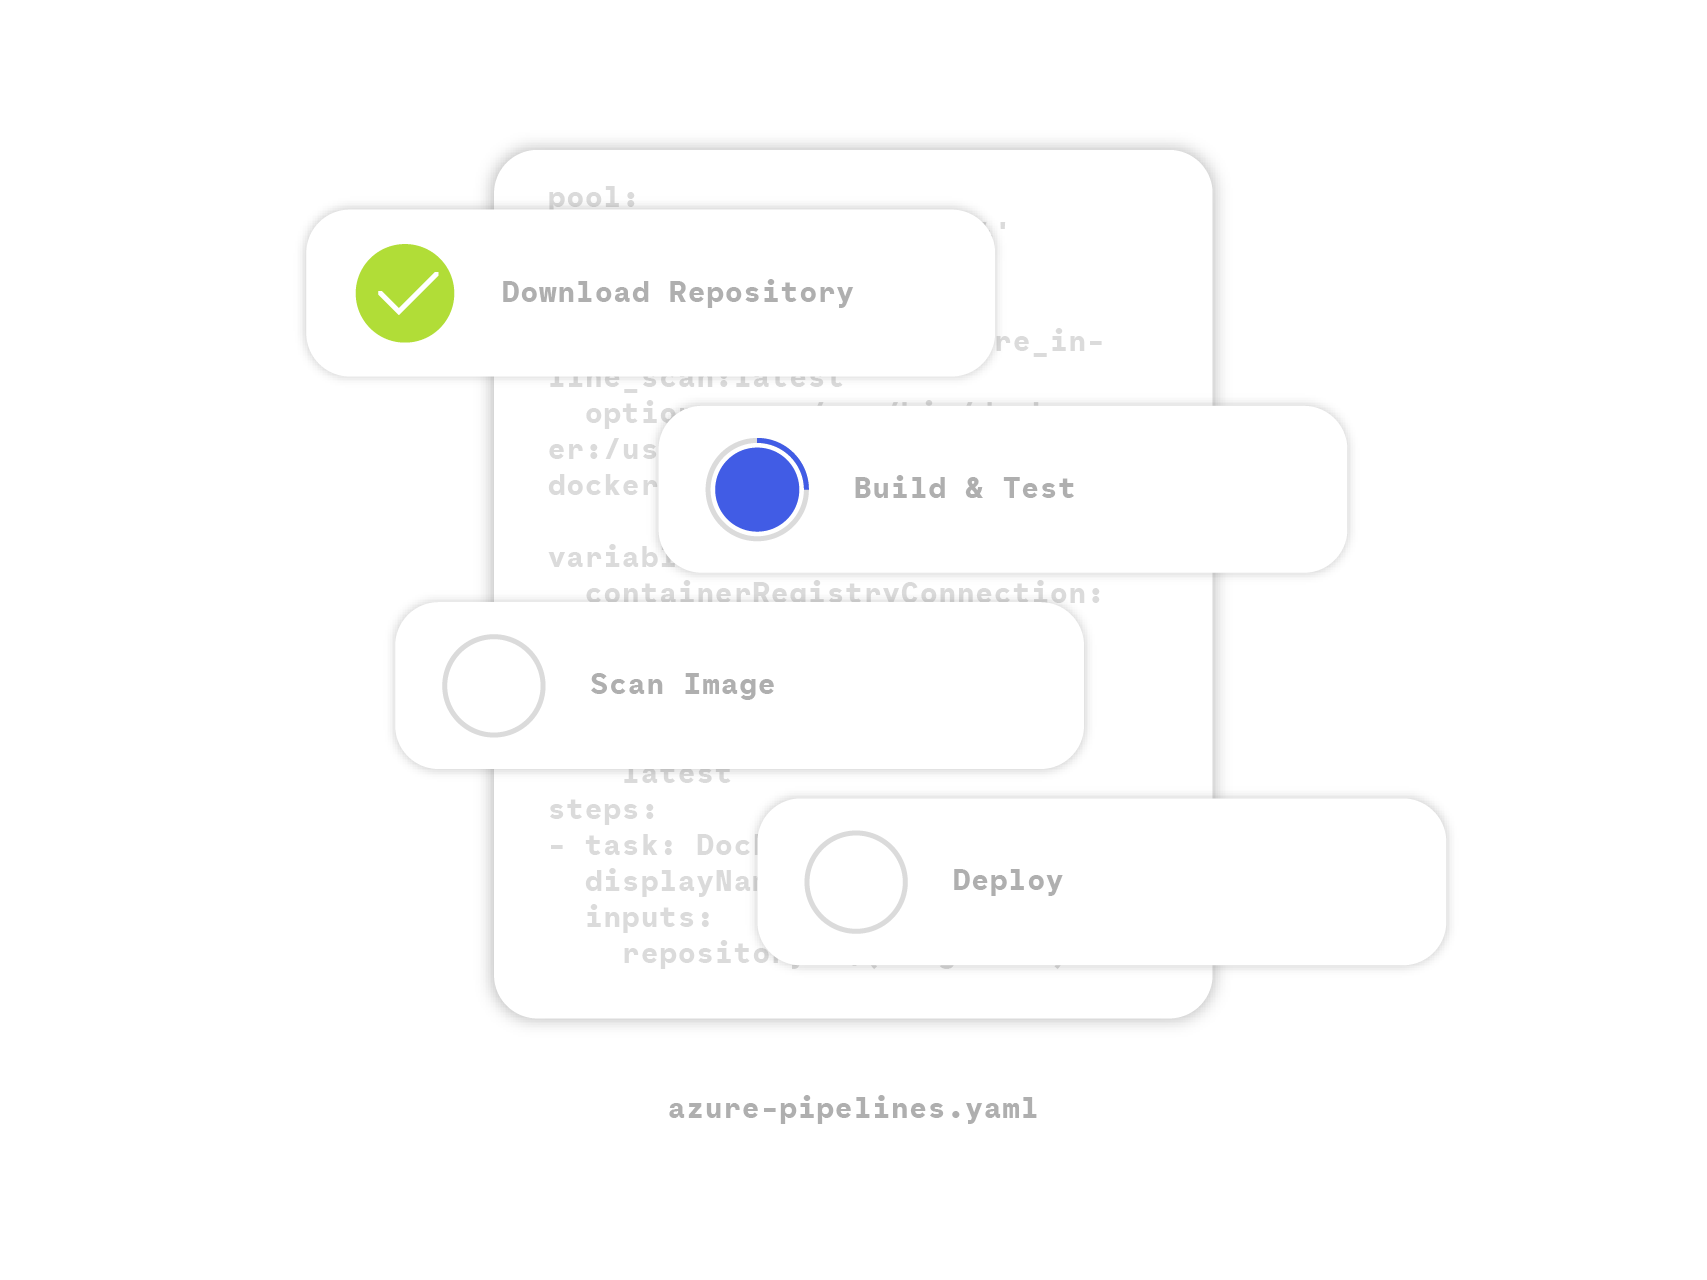
Everything is now in place, so let’s dig into the pipeline definition. Basically, the workflow is as follows:
- Build the container image and store it locally
- Download the
sysdig-cli-scannertool if needed - Perform the scan
- Push the container image to a remote registry
The workflow also leverages the Azure Pipeline cache to avoid downloading the binary, the databases, and the container images if they are available.
Let’s go through the different steps in the pipeline.
The versions used in this example are Azure agent version: ‘2.209.0’, Image: ubuntu-20.04 (Version: 20220828.1, Included Software: https://github.com/actions/runner-images/blob/ubuntu20/20220828.1/images/linux/Ubuntu2004-Readme.md), Runner Image Provisioner: 1.0.0.0-main-20220825-1 and Sysdig-cli-scanner version 1.2.6-rc (commit: 17bb64a)
If using the legacy scanner, the pipeline definition is different. It requires to use the sysdiglabs/secure-inline-scan container image. See an example provided in the sysdiglabs/secure-inline-scan-example repository.
Preparation
A pretty standard configuration, it is triggered when pushing into the main branch and it uses the default container image (ubuntu-latest).
trigger:
- main
pool:
  vmImage: ubuntu-latest
We also define a few variables that will be used in different steps:
- The
CACHE_FOLDERwhere the assets are saved - The Sysdig Secure API endpoint (
SYSDIG_SECURE_ENDPOINT) - The image details (
REGISTRY_HOST,IMAGE_NAME, andIMAGE_TAG) - And the name of the connection to the container registry created before (
REGISTRY_CONNECTION)
variables:
  CACHE_FOLDER: $(Pipeline.Workspace)/cache/
  SYSDIG_SECURE_ENDPOINT: "https://eu1.app.sysdig.com"
  REGISTRY_HOST: "quay.io"
  IMAGE_NAME: "e_minguez/my-example-app"
  IMAGE_TAG: "latest"
  REGISTRY_CONNECTION: "quayio-e_minguez"
Cache
Setup cache for the binary and assets (such as the vulnerability database) to avoid downloading it every single time:
- task: Cache@2
  inputs:
    key: |
      sysdig-cli-scanner-cache | "$(Agent.OS)" | "$(CACHE_FOLDER)/sysdig-cli-scanner" | "$(CACHE_FOLDER)/latest_version.txt" | "$(CACHE_FOLDER)/db/main.db.meta.json" | "$(CACHE_FOLDER)/scanner-cache/inlineScannerCache.db"
    restoreKeys: |
      sysdig-cli-scanner-cache | "$(Agent.OS)"
      sysdig-cli-scanner-cache
    path: $(CACHE_FOLDER)
  displayName: Cache sysdig-cli-scanner and databases
Setup cache for the container images to avoid downloading them every single time
- task: Cache@2
  displayName: Docker cache
  inputs:
    key: 'docker | "$(Agent.OS)" | cache'
    path: $(Pipeline.Workspace)/docker
    cacheHitVar: CACHE_RESTORED
Load the container images from the cache if they are available:
- script: |
    docker load -i $(Pipeline.Workspace)/docker/cache.tar
  displayName: Docker restore
  condition: and(not(canceled()), eq(variables.CACHE_RESTORED, 'true'))
Build
Build the container image using the Docker@2 task:
- task: Docker@2
  inputs:
    command: 'build'
    Dockerfile: 'love/Containerfile'
    buildContext: 'love/'
    repository: $(REGISTRY_HOST)/$(IMAGE_NAME)
    tags: $(IMAGE_TAG)
    addPipelineData: false
    addBaseImageData: false
This build process generates one container image per tag. We could build more than one image per commit with different tags, like the commit hash or commit tags, but we are keeping things simple.
Scan
Download the latest version of the sysdig-cli-scanner binary only if needed:
- script: |
    curl -sLO https://download.sysdig.com/scanning/sysdig-cli-scanner/latest_version.txt
    mkdir -p $(CACHE_FOLDER)/db/
    if [ ! -f $(CACHE_FOLDER)/latest_version.txt ] || [ $(cat ./latest_version.txt) != $(cat $(CACHE_FOLDER)/latest_version.txt) ]; then
      cp ./latest_version.txt $(CACHE_FOLDER)/latest_version.txt
      curl -sL -o $(CACHE_FOLDER)/sysdig-cli-scanner "https://download.sysdig.com/scanning/bin/sysdig-cli-scanner/$(cat $(CACHE_FOLDER)/latest_version.txt)/linux/amd64/sysdig-cli-scanner"
      chmod +x $(CACHE_FOLDER)/sysdig-cli-scanner
    else
      echo "sysdig-cli-scanner latest version already downloaded"
    fi
  displayName: Download the sysdig-cli-scanner if needed
Run the scanner. This is the real deal, and as you see, it is super simple:
- script: |
    $(CACHE_FOLDER)/sysdig-cli-scanner \
      --apiurl $(SYSDIG_SECURE_ENDPOINT) \
      --console-log \
      --dbpath=$(CACHE_FOLDER)/db/ \
      --cachepath=$(CACHE_FOLDER)/scanner-cache/ \
      docker://$(REGISTRY_HOST)/$(IMAGE_NAME):$(IMAGE_TAG) \
  displayName: Run the sysdig-cli-scanner
  env:
    SECURE_API_TOKEN: $(TOKEN)
NOTE: We converted the TOKEN secret variable to an environment variable as required by the sysdig-cli-scanner tool.
Final tasks
Push the container image to the repository:
- task: Docker@2
  displayName: Push the container image
  inputs:
    containerRegistry: $(REGISTRY_CONNECTION)
    repository: $(IMAGE_NAME)
    command: push
    tags: $(IMAGE_TAG)
    addPipelineData: false
    addBaseImageData: false
Save the container images used for future pipeline executions:
- script: |
    mkdir -p $(Pipeline.Workspace)/docker
    docker save $(docker images -q) -o $(Pipeline.Workspace)/docker/cache.tar
  displayName: Docker save
  condition: and(not(canceled()), or(failed(), ne(variables.CACHE_RESTORED, 'true')))
Running the pipeline
Finally, we are ready to execute the pipeline and see it in action in Azure!
After pushing a commit to our GitHub repository, we can see the pipeline working in the Azure web console. Here are the results of our pipeline:
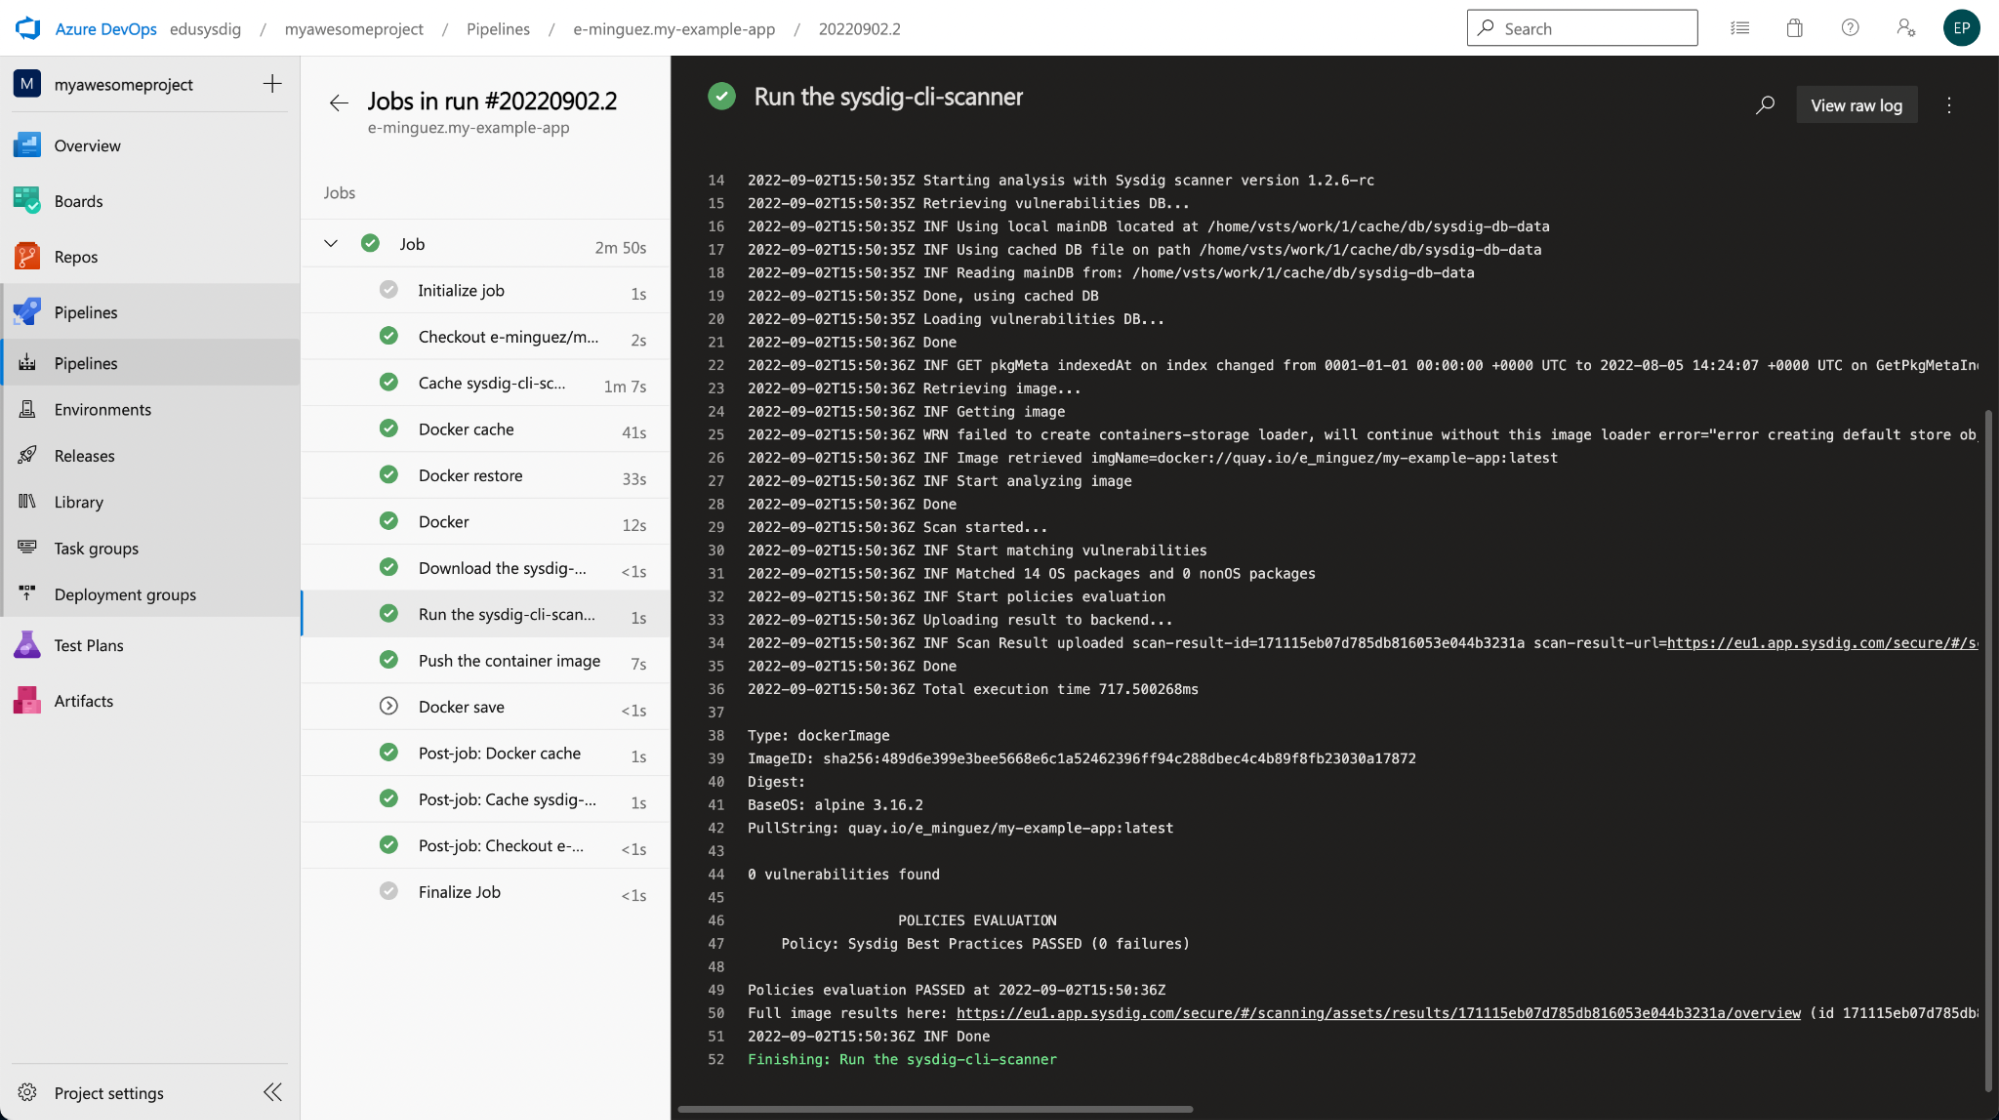
As you can see, it worked. The scan finished properly and it was performed in a second.
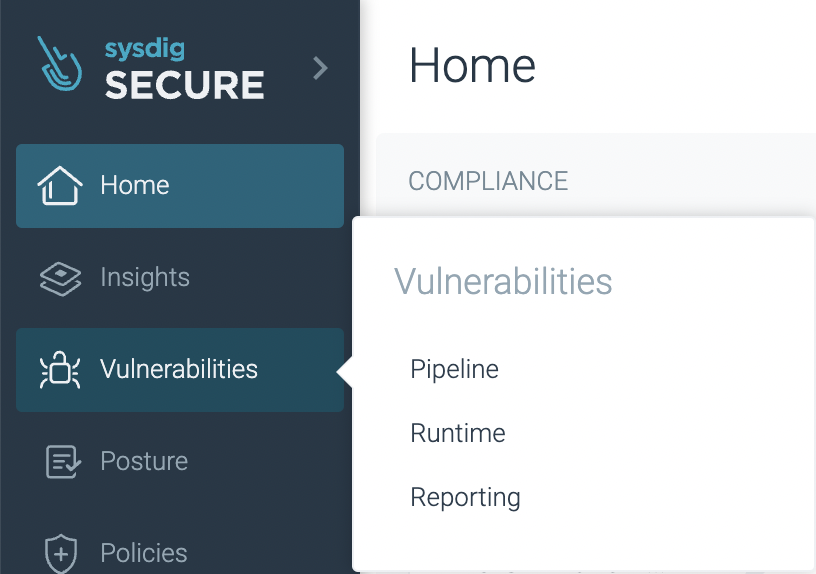
Image scanning results within Sysdig Secure
Back to Sysdig Secure, we can further analyze these results.
The legacy scanner results are slightly different, see the official documentation for more details.
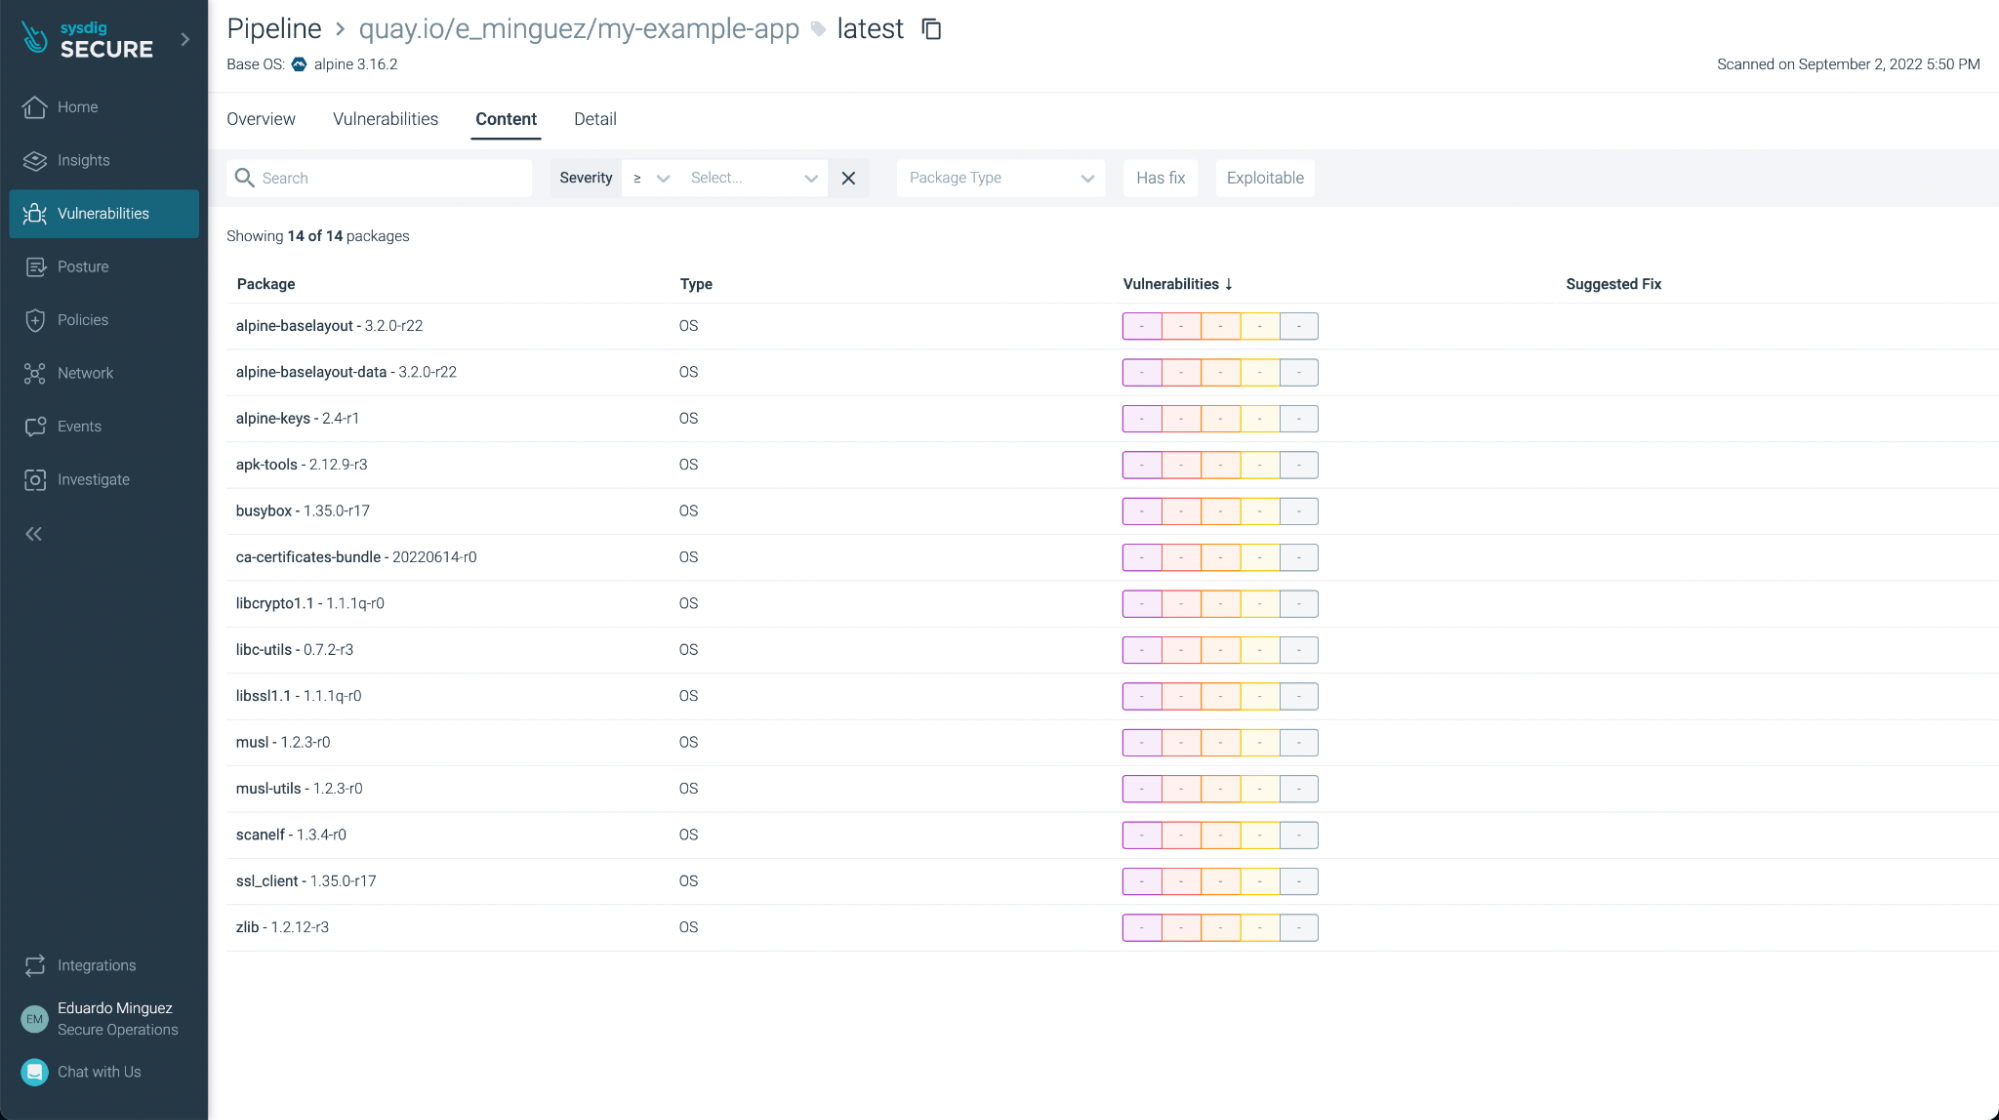
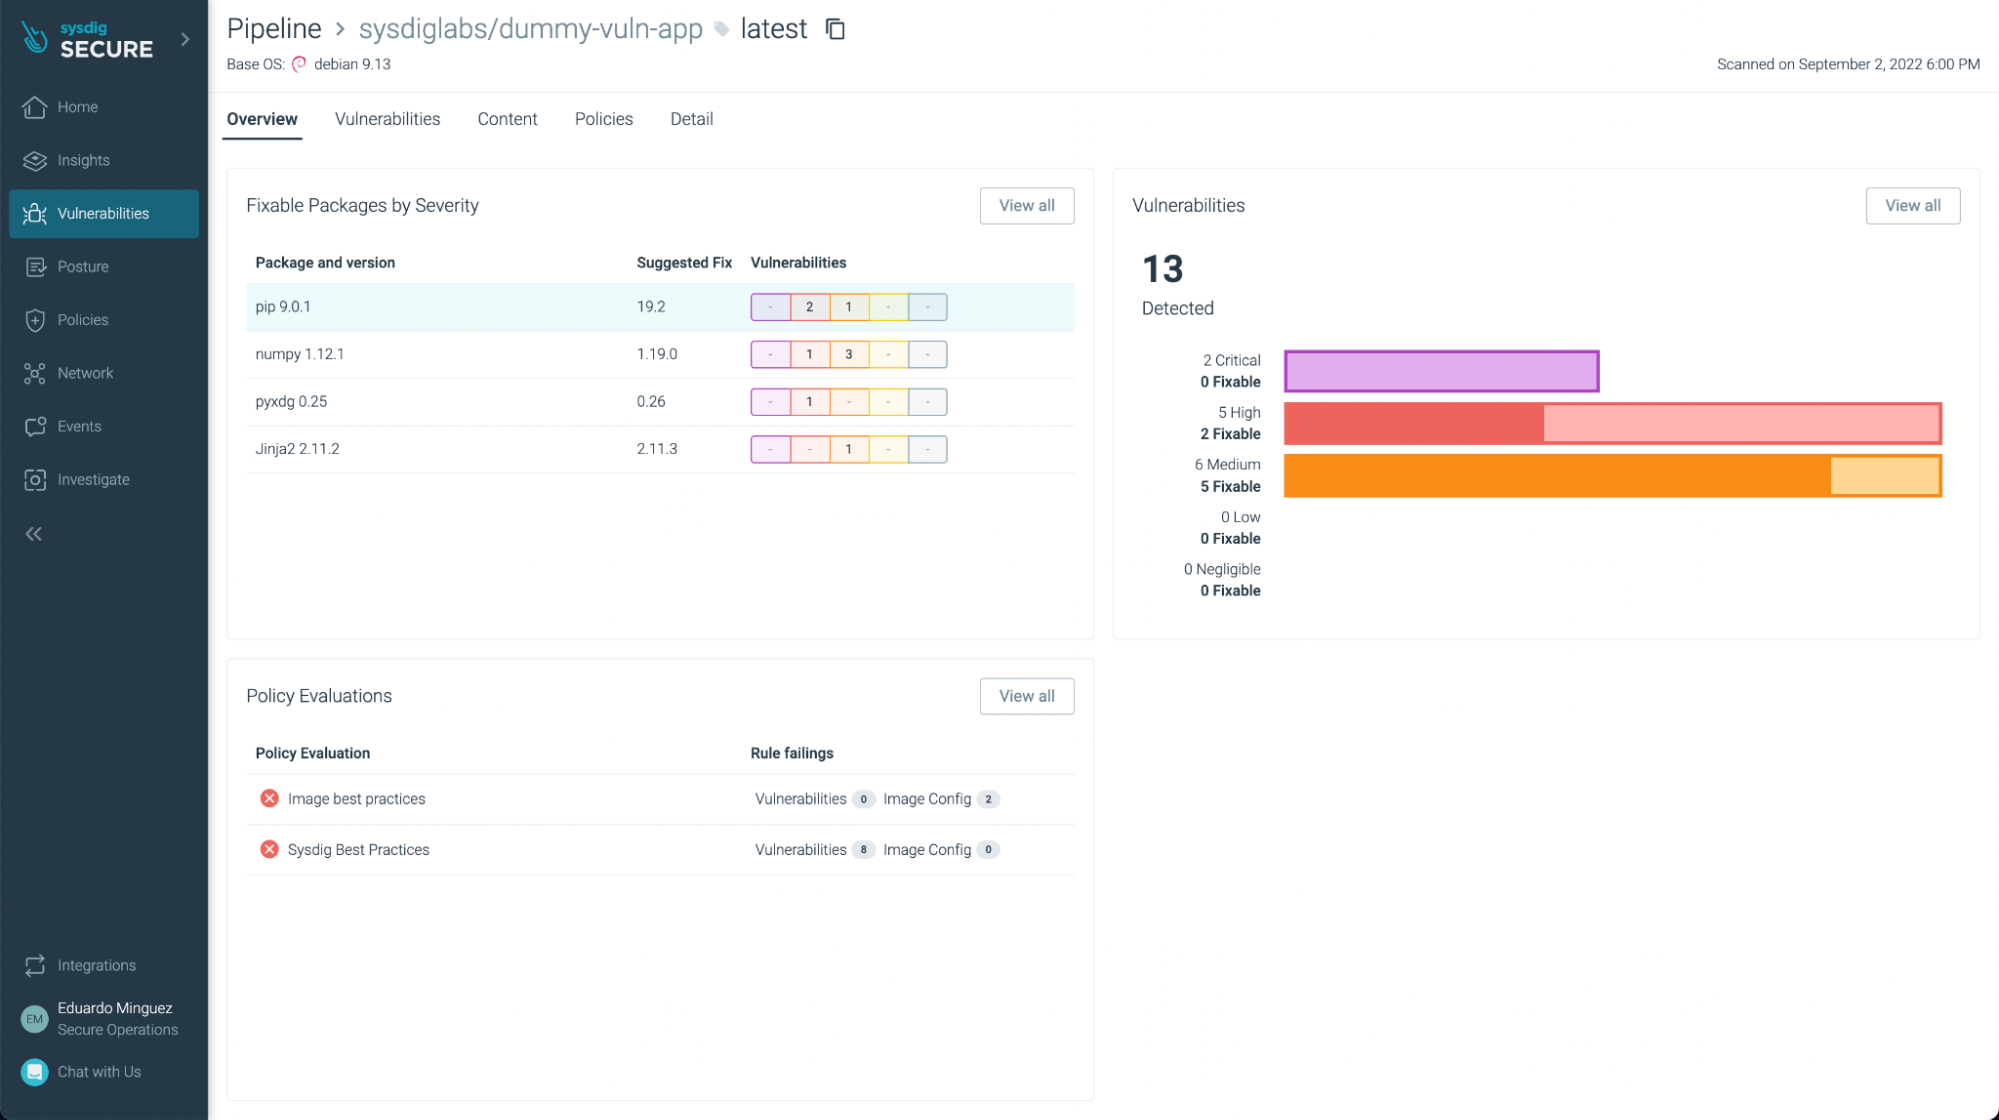
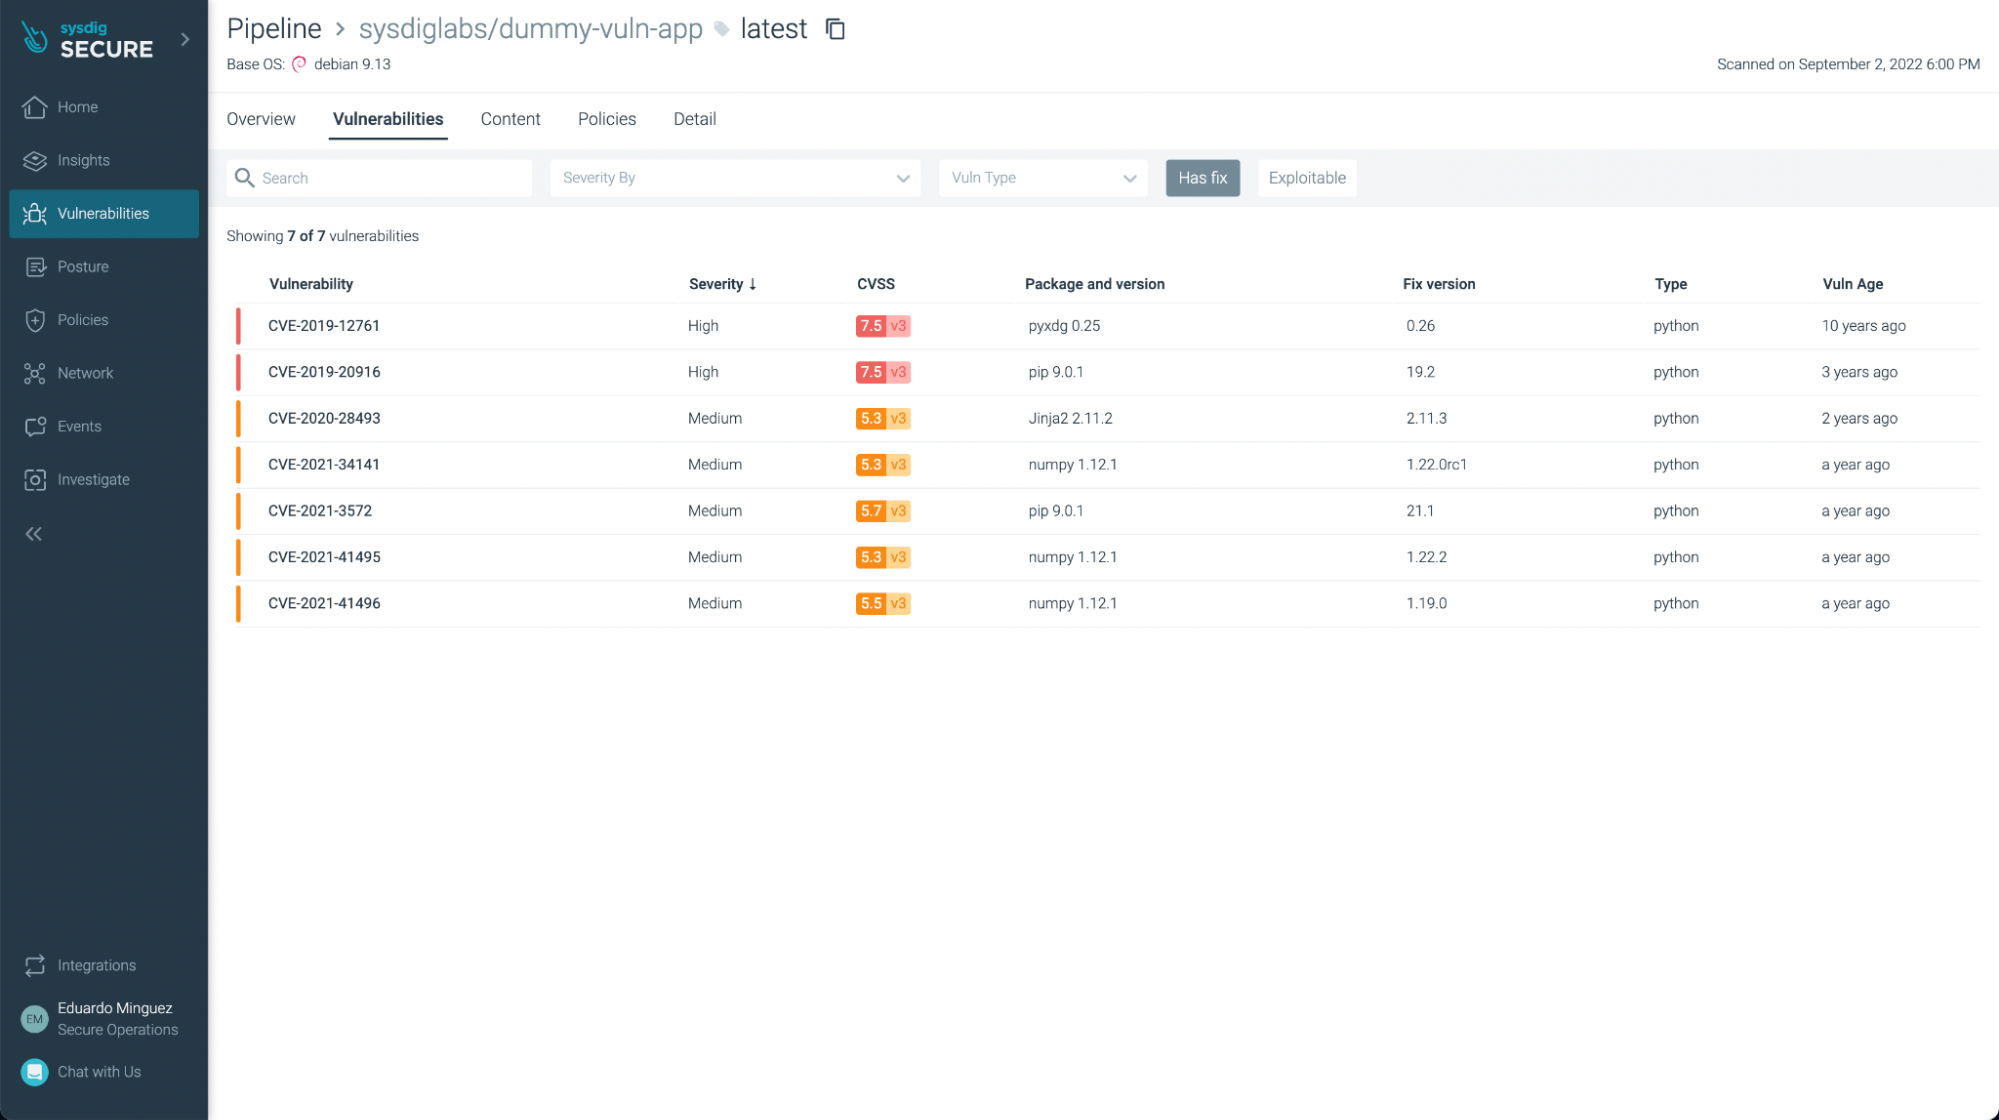
There weren’t any vulnerabilities found in this basic application (yay!), but if we look at another application, such as https://github.com/sysdiglabs/dummy-vuln-app, we can see some were discovered:
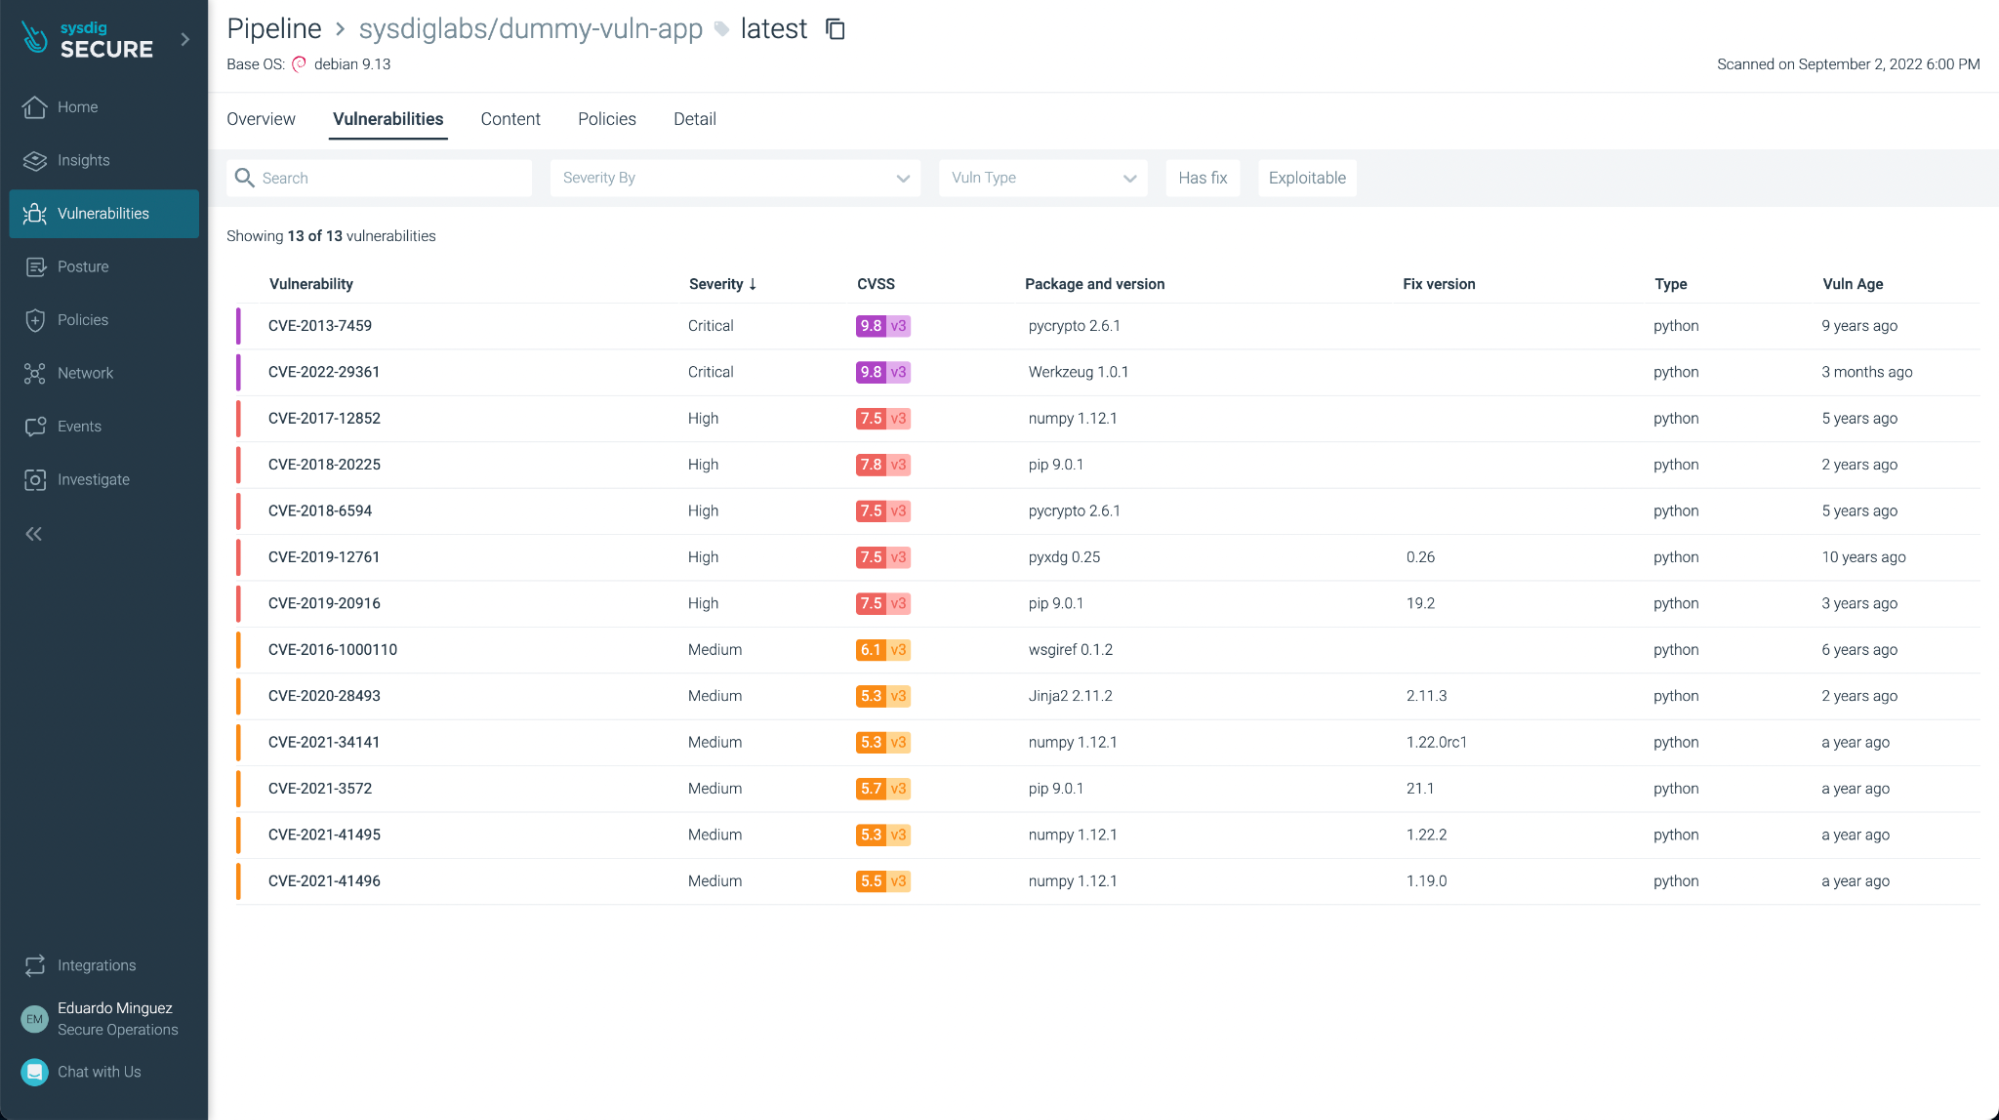
You can filter the ones that have fixes already and/or are exploitable, so you can focus on the most urgent ones to fix or update:
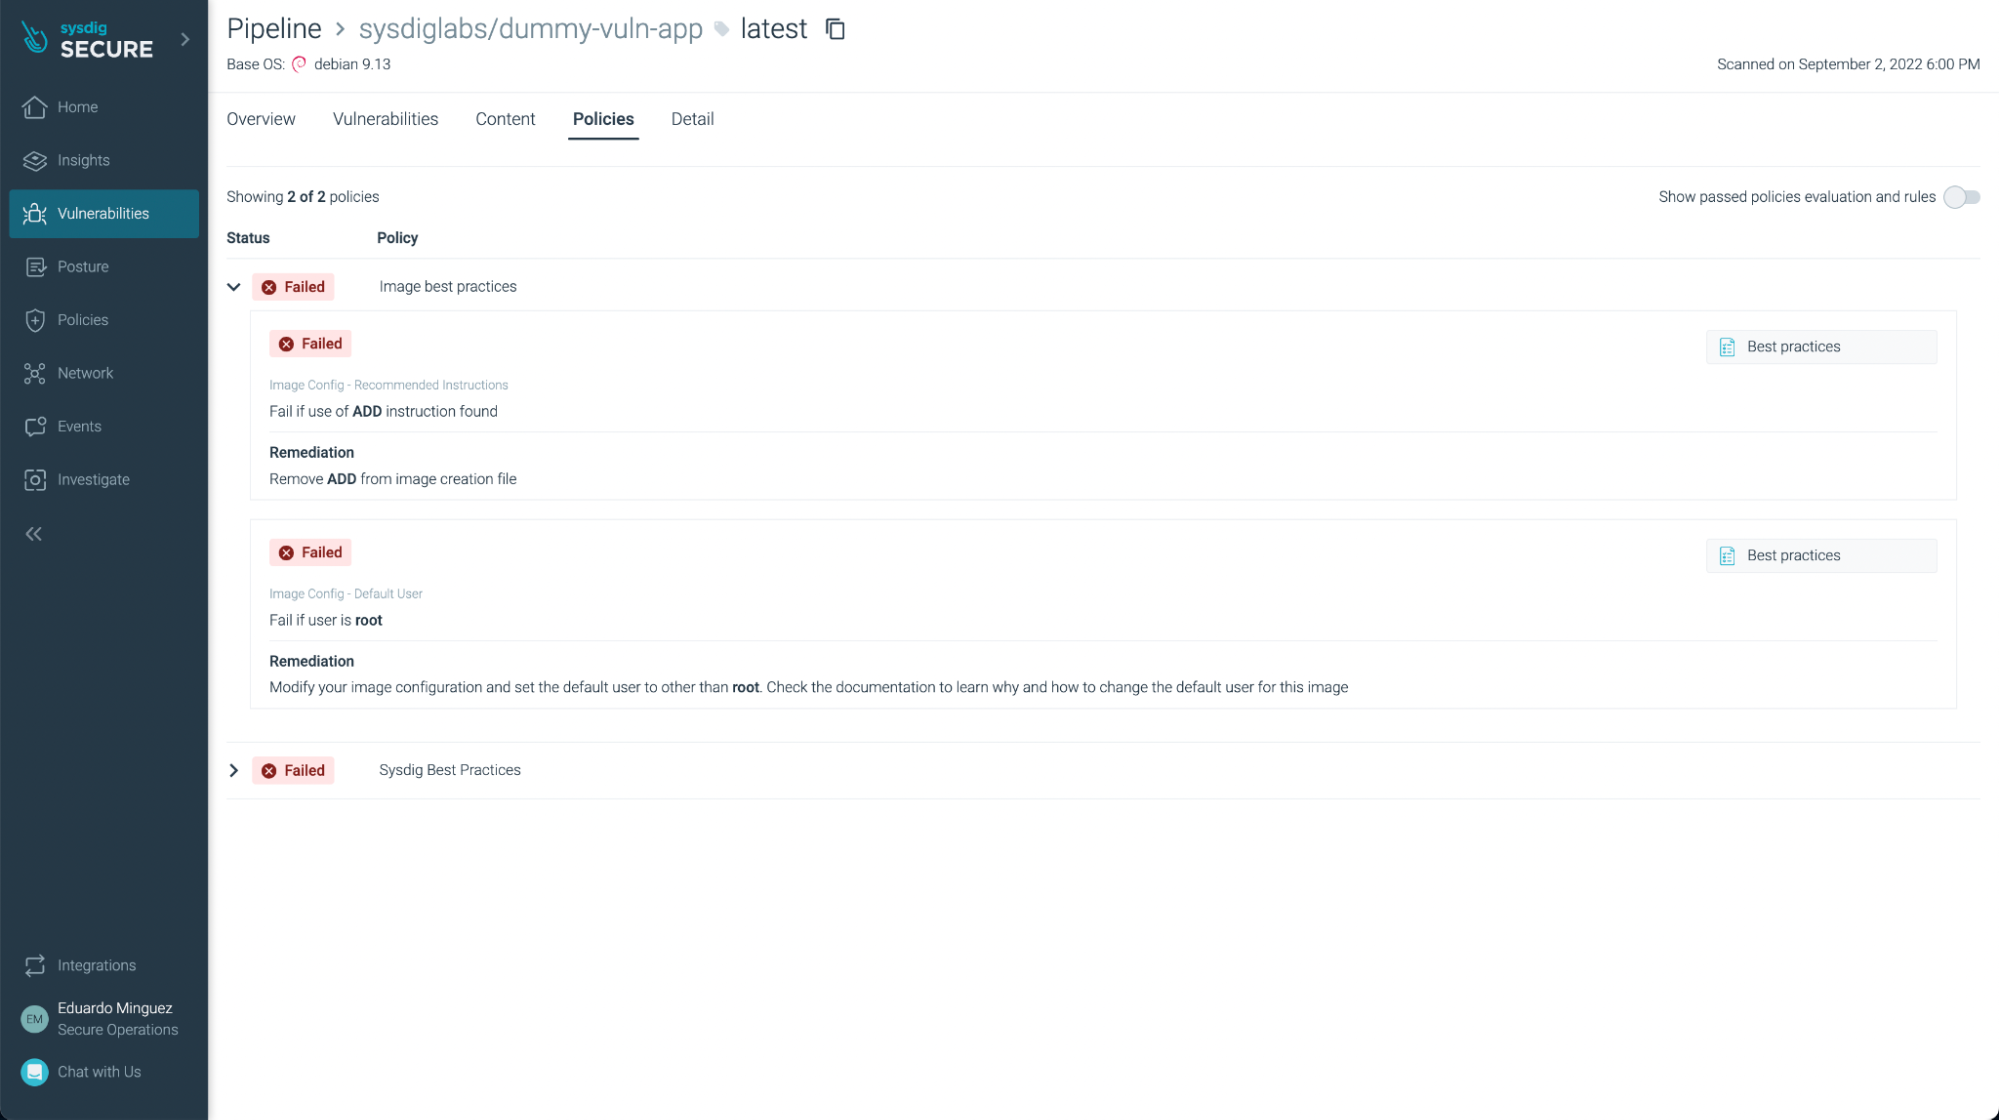
You can see not just vulnerabilities but also some not best practices:
Conclusions
Using Sysdig, we can scan the images we create in Azure DevOps Pipelines in a really straightforward process. Thanks to local scanning capabilities, you can scan our images without having them leave your infrastructure and even scan images that are locally built.
By detecting issues earlier in the CI/CD pipeline, image scanning allows DevOps teams to shift security left, improve delivery to production time, and raise the confidence of running their images in production.